How to Set Up a Telegram Bot with BotFather
You register and configure bots via @BotFather—which itself is an official Telegram bot.
Registration
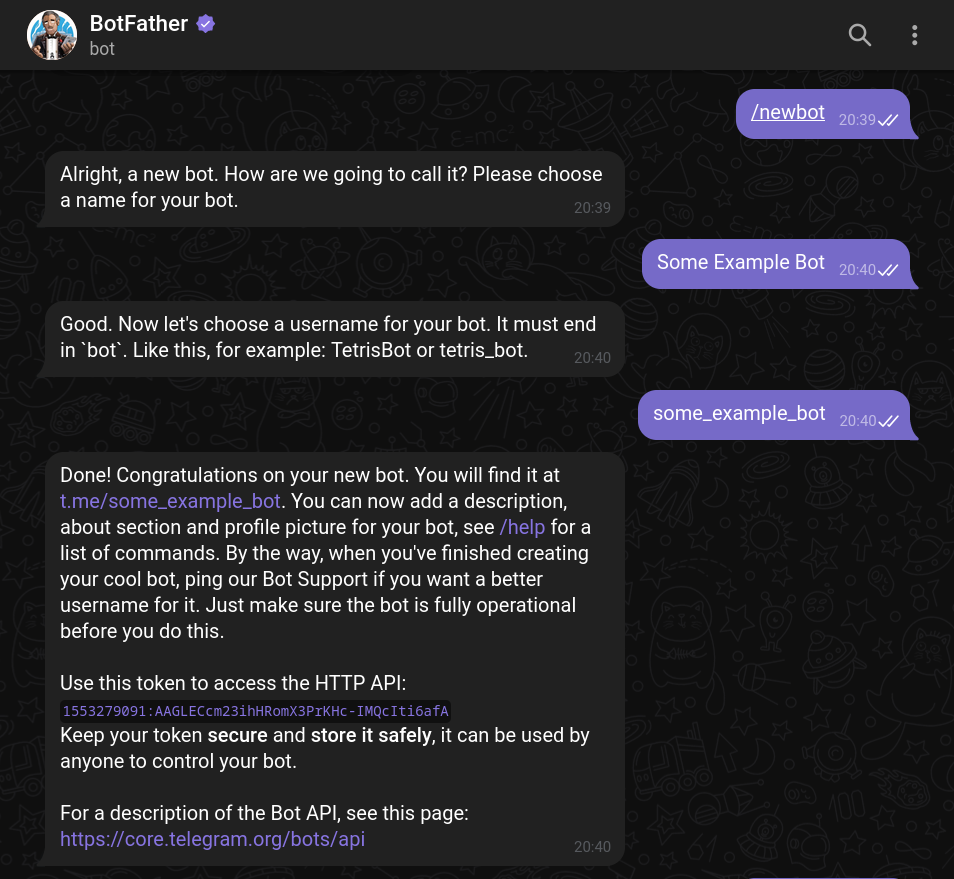
Once you start BotFather, it will suggest you create a bot with the /newbot command. You'll choose its name and username, and then the bot profile will be created.
You'll obtain the bot token, which looks like 1553279091:AAGLECcm23ihHRomX3PrKHc-IMQcIti6afA. The token is your key to control the bot.
Settings
In BotFather, it's easy to edit bot settings using the /mybots command. This is how you customize the bot profile and configure special features—like forbidding being added to groups.
You may register up to 20 bots.
Customization
You can open your bot's profile and click “edit” to change its avatar, name, intro, and “about” text. This feature is relatively new—previously, BotFather commands were the only way to change a bot's profile settings.
Intro (aka description) is the text users see before they start a dialog with the bot. It can contain a picture or even a GIF.
UX TIP
Spend some time filling out the bot profile: it will be helpful and convenient for users. Add a profile picture to make the bot more distinguishable in the chat list. It may be a good idea to include your contacts in “About”.
INFO
In BotFather, you can also edit command hints or the inline mode placeholder.
Transferring
If you need to transfer ownership to another person, you can do it through BotFather itself. This is often useful when you develop a bot for a client or organization.
To transfer, you must have 2FA enabled (for at least 7 days) and the recipient must have started a dialog with the bot.